CMS (3)
Content changes, that you make via the Partnershop backend CMS module, must be saved and published, so that they are displayed in the shop. [1][2][3]
The prerequisite for this is that the edited page has the status “Page Is Currently Released” (green) [4] and has been saved. Click the button “Save Changes”. [5]
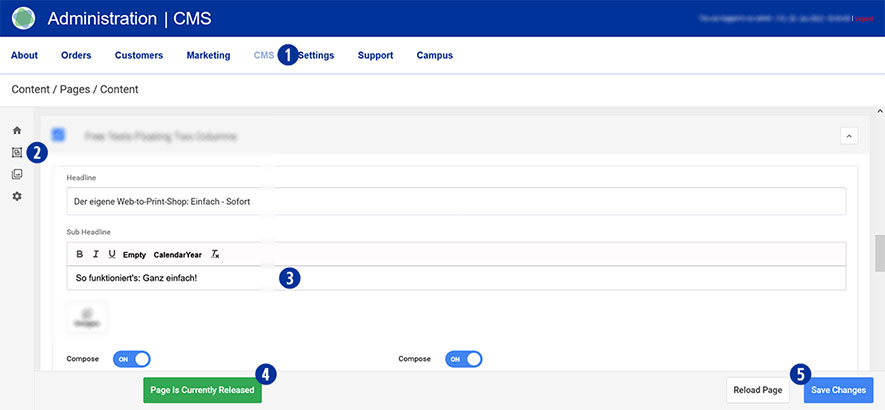
If the “Page Is Currently Released” status is not green, click the button “Page Is Currently Released”.
By clicking on the icon “+”, a new release time is set and confirmed by clicking on the button “Confirm”.
After completing all changes, switch to your Partnershop Backend / CMS / Administration / Redis Management / Exports. [6]
Click the button “Create Productive Version”. [7]
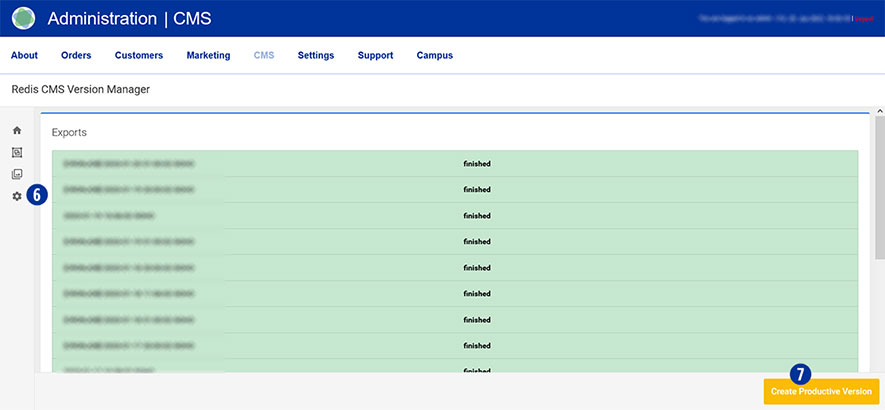
Sequence:
- A new job “new” (marked red) is created under “Exports”.
- Within 60 seconds the new export will start and your job will be displayed as “wip” (highlighted in blue).
- After a successful export, your job will be displayed as “finished” (marked in green).
Your changes are now visible to all customers in the shop.
Yes, you can edit the content of the tiles visible on the home page.
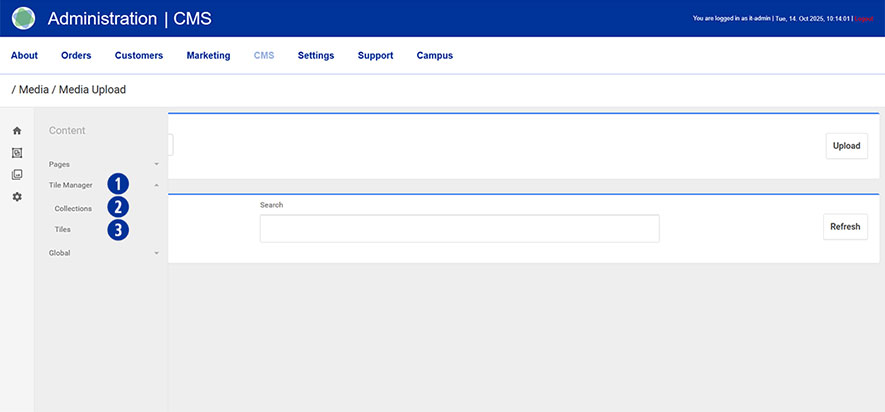
The Tile Manager [1] in the CMS is used to manage and design the tiles on the home page.
You can customise content using the Collections [2] and Tiles [3] tools:
- Collections group and structure multiple tiles into a coherent area.
- Tiles are individual tiles with images, text or links that can be edited and arranged individually.
A tile can be included in several collections.
Each collection and each tile has a collection type.
For editing the tiles on the homepage, the collection type ‘Start Navigation’ is relevant.
In the Partnershop backend, go to Content → Tile Manager → Collections. [4]
Select the collection type ‘Start Navigation’. [5]

You will see the two collections ‘Start Categories’ [6] and ‘Start Topseller’. [7]
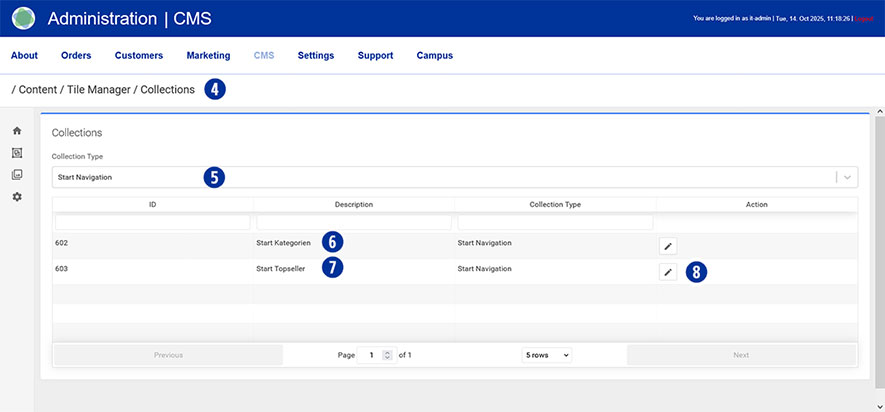
By clicking the edit icon [8] of the desired collection (e.g. ‘Start Topseller’) [7], you will see an overview of the tiles contained in it. [9]
To edit a tile, first select the title of the desired image. [10]

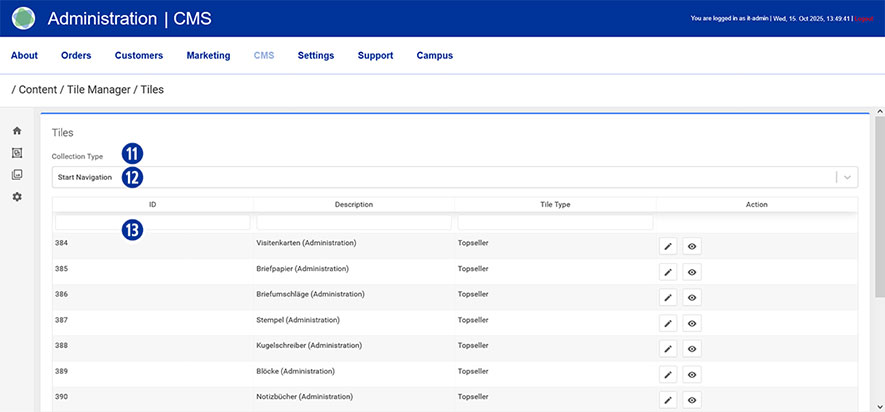
Next, open a new browser tab and navigate in the Partnershop backend to Content → Tile Manager → Tiles. [11]
Again, select the collection type ‘Start Navigation’. [12] In the list displayed below, you will see all tiles available in this collection. [13]
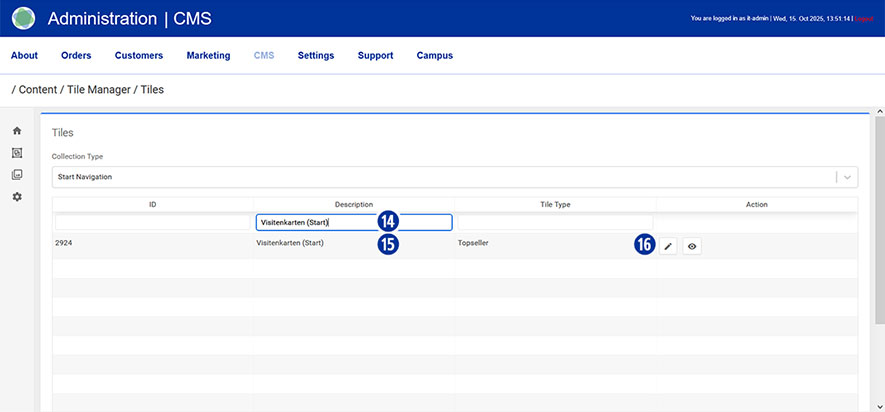
Then paste the tile title you copied to the clipboard into the input field [14] under the column heading ‘Description’.
Make sure that the spelling is correct and that you use the correct upper and lower case letters.
Once you have entered the correct title, the tile selected for editing will be displayed. [15]
Click on the ‘edit icon’ [16] for the selected tile to access the data record for editing.
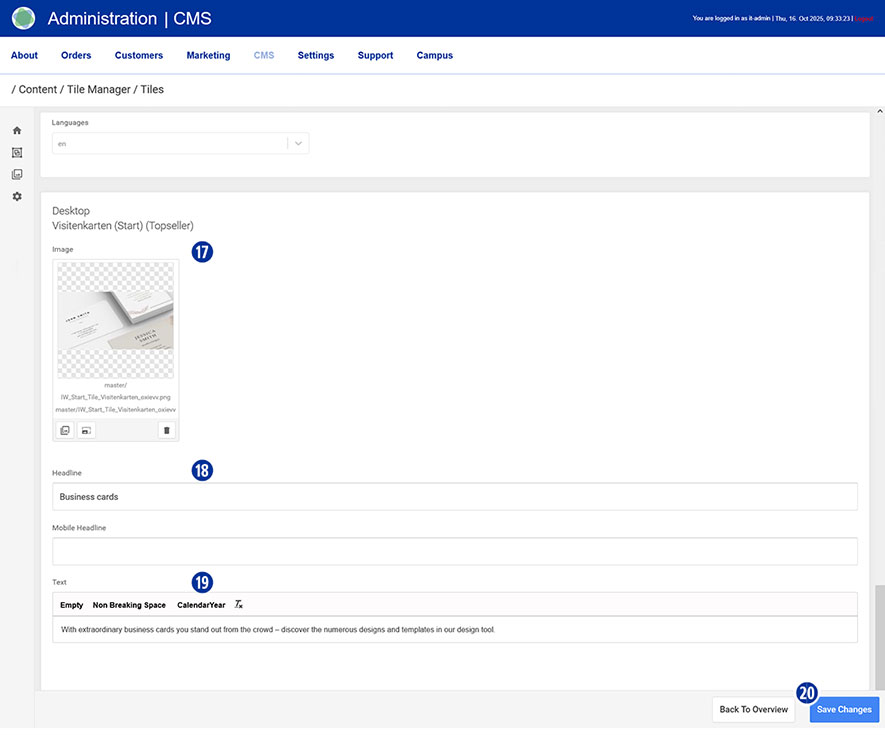
The following content can be customised:
- Image [17]
- Headline [18]
- Text [19]
Confirm your changes by clicking on the ‘Save Changes’ button. [20]
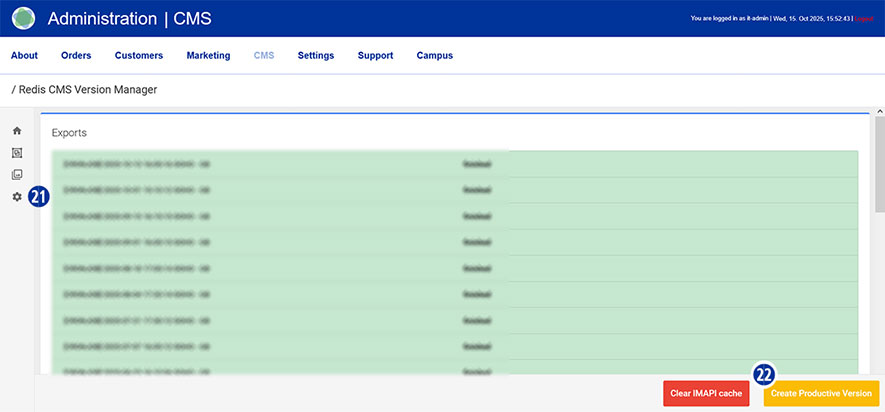
Once you have completed all adjustments, go to CMS → Administration → Redis Management → Exports [21] in the Partnershop backend and click on the ‘Create Productive Version’ button. [22]
Your changes will be visible on the home page of your Partnershop shortly afterwards.
Note
Before images can be exchanged in tiles, they must first be uploaded to the media library via Media → Upload. It is essential to observe the applicable specifications for resolution, file size and spelling to ensure correct display on the home page.
In the Tile Manager, the content for the language specified in the shop can be selected.
In Swiss shops, for example, the languages ‘de’, ‘fr’ and ‘it’ are available.
Please change in your Partnershop backend to Customers. By using different search fields, you have the option to display information about your customer data.
In addition, it is possible to export the customer data from the partner shop backend. The data are stored in a *.CSV file, separated by commas. These data can be imported into a spreadsheet program (e.g. Microsoft Excel).
It is important that the previously generated *.CSV file is not openend but imported.
The following steps must be taken when importing data.
- Start Microsoft Excel and open a new datasheet
- In the menu Data choose the option “From text”
- Choose the saved *.CSV file –> path to the file “customers.csv”
- Push the button “Import”
- Choose the data type –> activate the radio button “Separated”
- Choose the file origin –> „65001 : Unicode (UTF-8)“
- Push the button “Continue”
- Choose the seperator –> activate the checkbox “Comma”
- Push the button “Continue”
- Push the button “Complete”
- Finish the Import to push the button “OK”
As a result, the data is comma-separated and imported into individual columns separately into the previously opened new Excel datasheet.